|
|
||
|---|---|---|
| .. | ||
| README.md | ||
README.md
First move
Brainpower mode
Context
Glad to see you here! It's impressive how far you've come today, and you are just one step away from seeing a simple yet impressive thing we can do with JavaScript. This will give you a glimpse of how JavaScript works with HTML and CSS to make your robot interesting! By using JavaScript, you will control and interact with your creation, adding dynamic abilities that make it come alive.
So far, you haven't learned much about JavaScript (but you will soon, don't worry!), but we want you to see an example of how powerful JavaScript can be in modifying the robot.
In these instructions, you will execute the steps to change your robot's eyes from open to closed using JavaScript! Does it seem simple? Yes, but you will later make your robot more dynamic by pushing a button to open and close that eye! Of course, that's for when you learn more about JavaScript (Again, a secret for you because you made it until here).
This is more of a puzzle to use your brain to follow hints and make things work, even if it seems complex (it is not!). Isn't that your brain's superpower?
Follow the instructions, ask your peers if you are stuck and stay motivated because you are close to the Shape Crafting goal! Follow every hint you have in the subject!
Instructions
- for the JavaScript (JS) files, when you have to link one, it's named like so:
name-of-the-exercise.js
Still there? Well done! But hold on, here begins the serious part... In order to control your creation, you're going to plug its brain: JavaScript.
First, define this new class in your CSS file:
.eye-closed {
  height: 4px;
  padding: 0 5px;
  border-radius: 10px;
}
Task 1
Second, Link a JS script to your HTML file.
Task 2
Then in your Javascript file, you're going to close the left eye of your entity. To do so, you have to target the eye-left HTML element by its id using the getElementById method.
Task 3
Then, set the style of your eye-left to change its background color to "black". We also need to modify its shape; for that, we are going to add a new class to it.
Code examples
Example 1
To target the nose HTML element by its id using getElementById:
In HTML file:
<!-- HTML -->
<div id="nose"></div>
In the JS file:
const nose = document.getElementById("nose");
Example 2
To change the color of the nose to red:
.nose-red {
  width: 20px;
  height: 20px;
  background-color: red;
  border-radius: 50%;
}
nose.classList.add("nose-red");
Example 3
To change the background color of nose to yellow:
nose.style.backgroundColor = 'yellow'
Expected output
By the way, do you like your new background color chosen earlier? Me too.
To personalize your robot even more, don't hesitate to change the inclination of its arms in a direction that reflects the personality you have chosen!
I think adding a rotation to thearm classis a good solution.
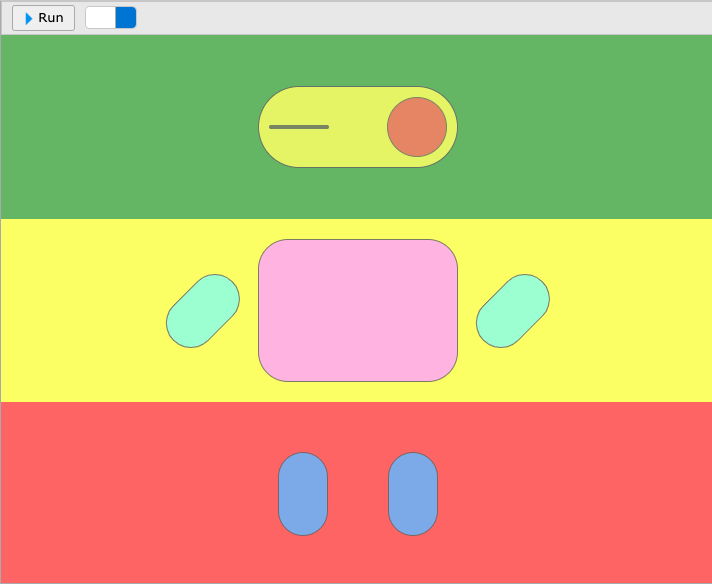
This is what you should see in the browser:
Resources
We provide you with some content to get started smoothly, check it out!